1. Maintain a Lush Lawn
A beautiful lawn is one of the best ways to boost your home’s curb appeal. Even if it’s seen better days, getting back on the right track is relatively easy with some easy best practices:
Know Your Grass Type
Knowing your grass type and understanding its specific needs will save you a lot of time and frustration in keeping it healthy.
Some grasses thrive during different parts of the year and may stay a bit yellow or brown in the winter no matter how much attention you give because it may be in a dormant stage.
Understanding optimal moisture levels is crucial for keeping your grass healthy. Some varieties require ample watering while others thrive in dry conditions. Be sure to understand your specific variety’s moisture needs to ensure proper watering.
Water Deeply, Not Daily
As mentioned, understanding your specific grass’ watering needs is critical. However, deep and infrequent watering is recommended for most types and experts recommend following these basic rules:
- Frequency: 2–3 times per week (depending on climate).
- Depth: Water should reach 6–8 inches deep.
- Best Time: Early morning (before 10 AM) to reduce evaporation and prevent disease.
2. Incorporate Colorful Planters
Adding unique elements like planters with colorful flowers or lush greenery can instantly change your home’s appearance. Here are some quick tips on choosing the right ones to have a big impact:
Start with Your Yard’s Color Palette
Your existing yard’s color scheme is highly important in order to pick planters that complement or even contrast effectively. Some key areas to consider include:
- Your house color including areas like siding, trim, and shutters
- Existing garden colors including mulch
- Hardscape (patio, fence, stone, wood)
Let the Plants Guide You
If your existing plants are already colorful, go for neutral or subdued planters (gray, white, terra cotta) to let the plants be the focal points.
If your plants are mostly green or have soft blooms, bright planters (turquoise, yellow, cobalt) can really make the space pop.
Mix Materials for Texture
Texture also adds a nice contrast so consider different materials and textures including:
- Glazed ceramic for shine and bold color
- Concrete or stone for earthy contrast
- Woven baskets or wood for a boho/natural touch. Just keep the tones complementary so it doesn’t feel chaotic.
3. Refresh Mulch in Garden Beds
Who doesn’t love the look and smell of fresh mulch? A quick refresh is an easy way to upgrade the look of your yard and also keeps plants healthy.
Clear Out Debris First
- Before anything else, make sure to start with a clean slate because who wants your new fresh mulch littered with debris?
- Rake out leaves, sticks, and any old, moldy mulch.
- Pull any weeds that have popped through.
Check Mulch Depth
- The ideal mulch depth is 2–3 inches around most plants.
- No more than 1 inch for shallow-rooted plants or seedlings.
- Pull it 2–3 inches away from the base of trees and stems to prevent rot.
- If it’s already thick enough, you might just need to fluff it up instead of adding more.
- If the mulch is matted down (like a crust), loosen it up with a cultivator or rake. This helps water and air reach the soil.
4. Illuminate Pathways
Lighting up your landscaping pathways can greatly level up your yard’s ambiance and give it that upscale resort feel. Here’s how to nail it:
Choose the Right Type of Path Lighting
There are a few popular options each with their own style and purpose. Definitely put these at the top of your list:
- Path Lights: These are typically classic fixtures on short posts that cast a soft glow downward and are great for defining walkways.
- Bollard Lights: Taller, sturdier lights that give off a modern vibe and spread light in all directions.
- Recessed Lights: Install these in the ground, steps, or along the edges of paths.
- Downlights: Mounted above in trees or structures, they cast a gentle glow downward like natural moonlight.
Pick Your Power Source
- Solar: Super easy to install, no wiring, and eco-friendly. Of course, best for areas that get a good amount of sun.
- Low Voltage (12V): More reliable and brighter than solar. But it requires a transformer and basic wiring so there is more cost and labor involved.
- Line Voltage (120V): This will be well past most homeowners’ needs unless they have expansive yards that need to be fully lit up. This option definitely requires a pro.
Plan the Placement Thoughtfully
- Space lights 5–8 feet apart to avoid runway vibes and harsh overlapping beams.
- Stagger them on either side of the path for a natural, balanced look.
- Focus on key transition points: steps, curves, entries, and intersections.
5. Add Window Boxes
Window boxes are a great way to add unique style to your home in an area that most people ignore. If done right, they will increase the charm factor in spades and take your home’s curb appeal to the next level. Check out some quick tips to help get your window box game on:
Pick the Right Size
- Length: Make sure that your window box is at least the width of the window or slightly wider. If too short, it will look strange not providing full coverage to both sides of the window.
- Depth & Height: Plants and their roots will need to grow into the soil, so aim for at least 8 inches deep. Deeper soil levels also allow for layering to fully fill out the box.
Choose a Style That Matches Your House
- Cottage/traditional: Wood boxes are perfect and will appear seamless when installed.
- Modern: Sleek metal or composite boxes with clean lines will blend in nicely.
- Farmhouse: Galvanized metal, black wrought iron, or rustic wood to keep with the industrial theme.
Secure It Properly
- Be sure to mount into studs or window frame supports and not just siding. Soil and plants are heavy so you don’t want it falling down and causing damage.
- Consider L-shaped or wall-mount brackets depending on the weight and material.
- Make sure the box is level and secure so it won’t sag over time.
Ensure Good Drainage
- Check for drainage holes and drill them if your box doesn’t have them. Proper drainage will limit root decay and keep your plants and flowers healthier.
- Add a layer of gravel at the bottom before the soil to help excess water drain.
- Consider using a drip tray if you want to protect or keep siding clean from runoff stains.
Layer Plants Like A Pro Designer
Many pros recommend the “Thriller, Filler, Spiller” formula:
- Thriller: Tall focal point
- Filler: Medium & bushy
- Spiller: Trailing and windy
6. Upgrade Your Mailbox
Mailboxes are typically right by the road and often one of the first things that people see in front of your home. Upgrading it is a quick and easy DIY project that can pay huge dividends to your home’s curb appeal. Whether you are planning a quick refresh or something entirely new, here are our top tips for upgrading your mailbox:
Pick a Style That Matches Your Home
- Your mailbox should complement your house so make sure to choose one that does not clash with it.
- Modern: We recommend sleek metal or black powder-coated finishes with clean lines.
- Farmhouse/rustic: Wood post with a metal box with aged metallic accents
- Classic/traditional: White or black mailbox with a decorative post. Add a monogram or house number for a final touch.
- Cottage/garden: Great opportunity to add flower boxes or other vintage touches.
Replace or Upgrade the Post
- Installing a decorative post to replace the standard 4×4 is super easy and will make a big impact. Here are some decorative touches to consider:
- Paint or stain the post to match your home.
- Add a bracket arm or finial for an extra level of fine detail.
- Use a post sleeve over the wood for zero maintenance and a finished look.
Paint or Swap Out the Mailbox
- Choose a contrasting or complementary color (e.g. matte black box on a white post, navy on a brick home).
- Spray paint your current box with rust-resistant outdoor spray paint for a fast glow up.
- Add custom vinyl decals or house numbers for that personal touch.
Add Landscaping Around the Base
Create a small flower bed or border around the mailbox with:
- Perennials
- Ground covers
- Small boxwoods or ornamental grasses for structure
- Edging stones or bricks for a clean frame
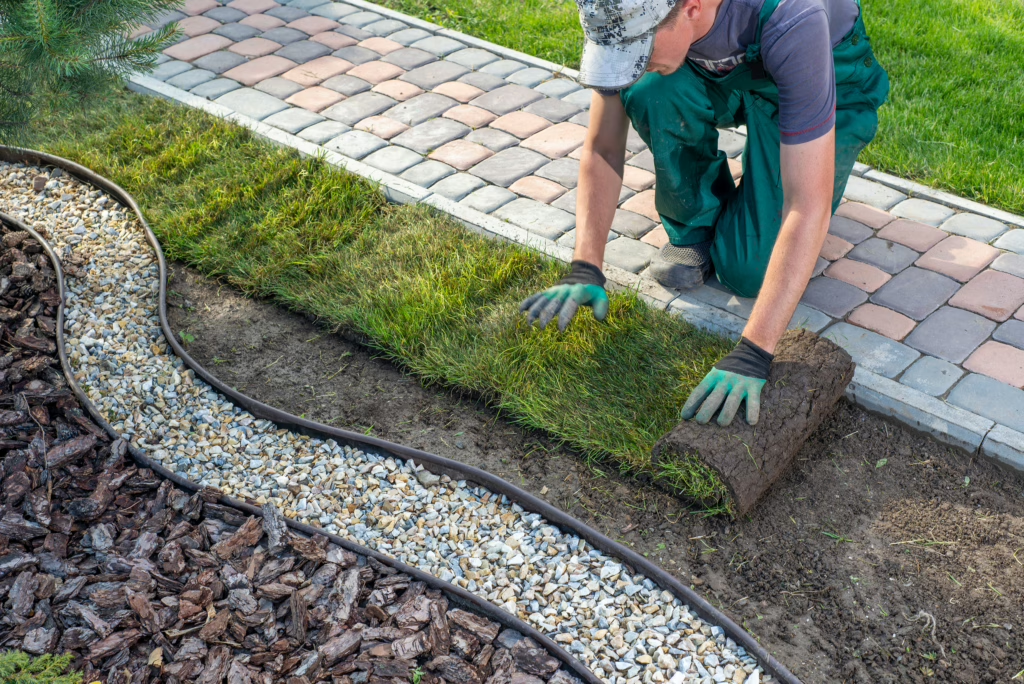
7. Install Edging for Flower Beds
Installing edging around flower beds is an elegant final touch. Check out these steps to get the perfect edging to complete your project:
Choose Your Edging Style
Pick something that fits your house and yard vibe:
- Stone or brick: Timeless, durable, and great for traditional homes
- Metal edging: Sleek, minimal, and great for modern styles
- Plastic or rubber edging: Budget-friendly, flexible, and comes in a wide variety of colors
- Wood: Rustic and warm
- Concrete scalloped edging: Classic and super easy to install
Mark Your Flower Bed Shape
- Circular or kidney bean shapes work well with their soft and natural curves that are more attractive than sharp angles.
- Keep the bed about 2–3 feet out from the mailbox for enough planting room and separation.
Dig a Trench for the Edging
- Dig 3–6 inches deep, depending on the height of your edging material.
- Make sure it’s level all the way around
- If you’re using stone or bricks, tamp the soil or add a layer of sand to stabilize them.
Install the Edging
- Place your edging snugly into the trench following the curve.
- For bricks or stone, lay them edge to edge and tap them into place with a rubber mallet.
- For metal or plastic, secure them with included stakes or nails.
By implementing these landscaping tips, you can transform your home’s exterior into a captivating and inviting space that reflects your personal style and enhances curb appeal.